Why Use Script Configs?
By using a script config (also known as a custom script), you can customize the configuration and mode of operation of a CacheFly service.
This guide contains different sections for adding script configs for general use in your CacheFly account or for a specific CacheFly service in your account:
Where to Add a Script Config (General)
How to Add a Script Config (General)
Where to Add a Script Config (Specific)
How to Add a Script Config (Specific)
Adding Existing Script Configs (Specific)
Adding New Script Configs (Specific)
Managing Script Configs
Additional Help Topics

Where to Add a Script Config (General)
To make a custom script generally available for use with services in your CacheFly account:
Log in to the CacheFly portal
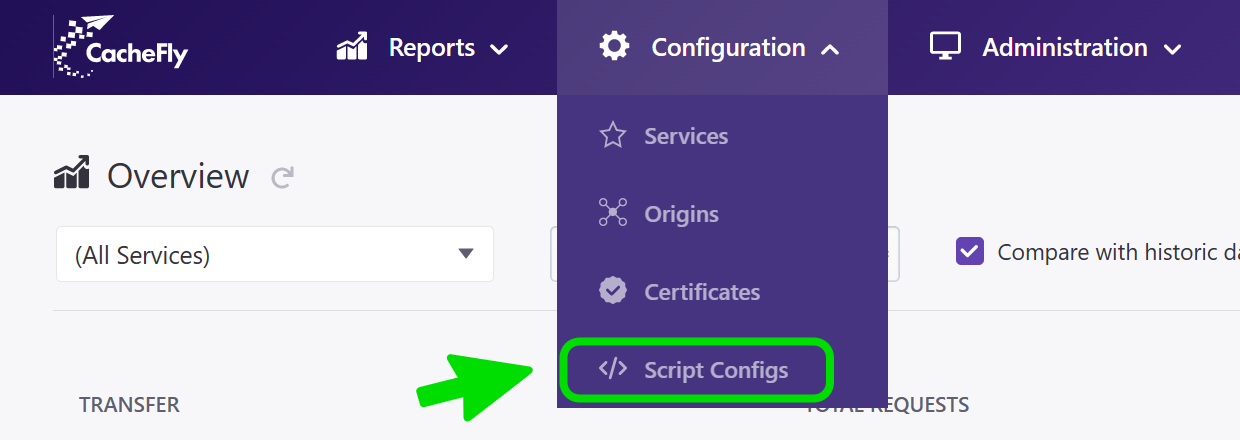
Navigate to the Configuration top-level menu
Click on the Script Configs menu item.
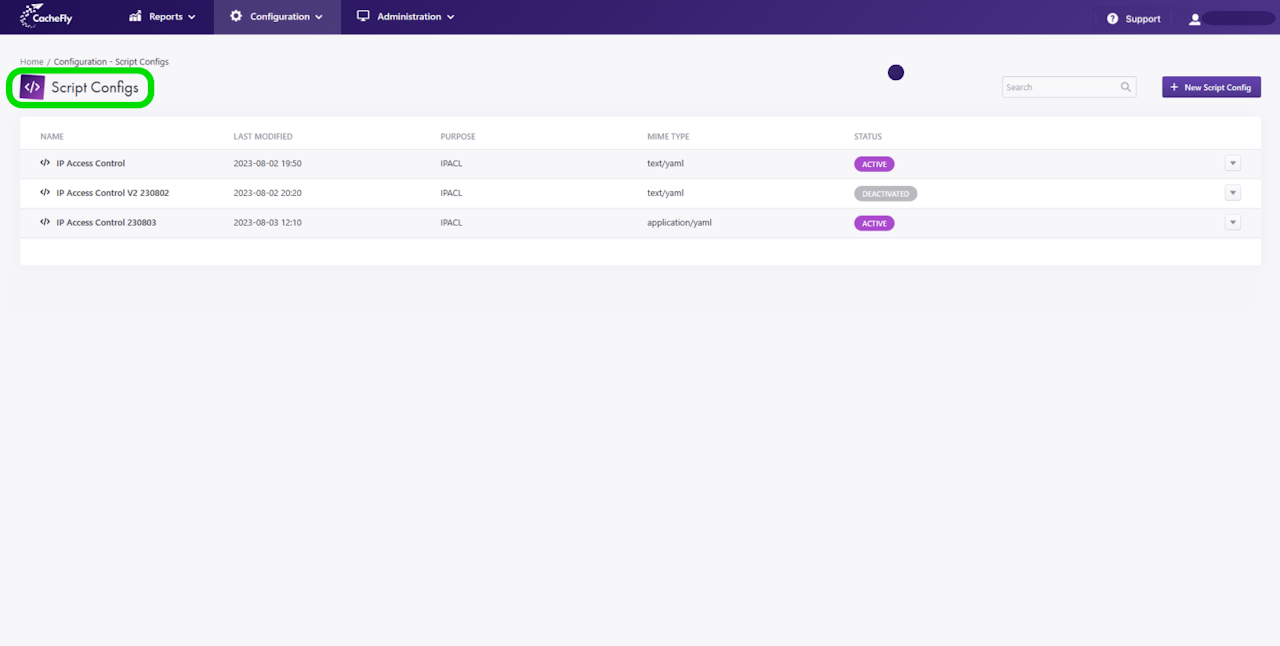
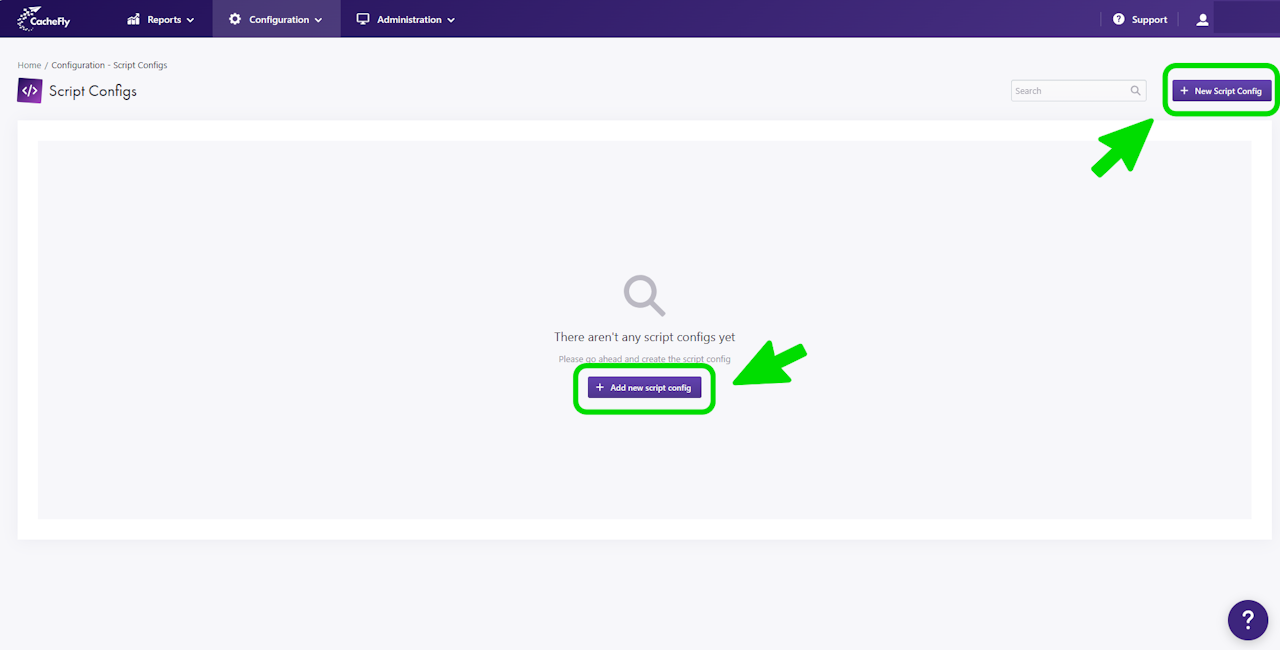
A list of your currently defined script configs appears (scroll the graphics in this step horizontally to see all the screens).

How to Add a Script Config (General)
The Script Configs screen (Configuration > Script Configs) displays the script configs that you can currently use (if any).
To add a script config, click the blue + New Script Config button.
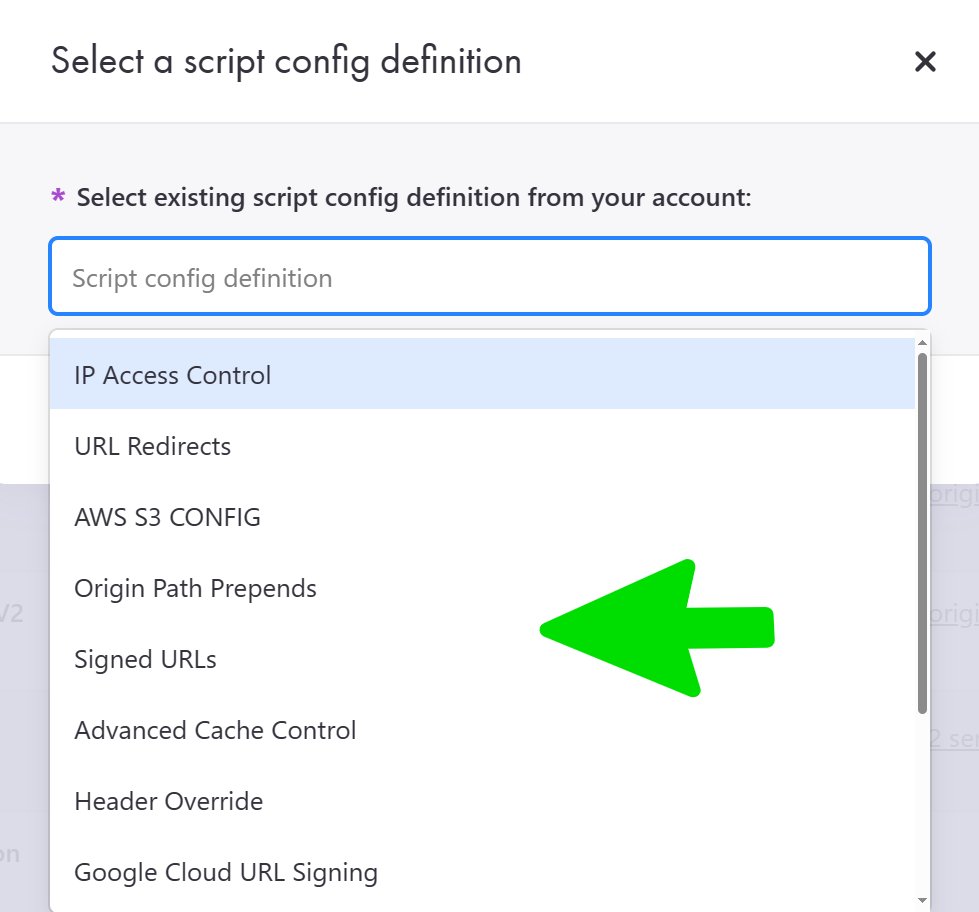
A popup window appears for you to select a script config definition.
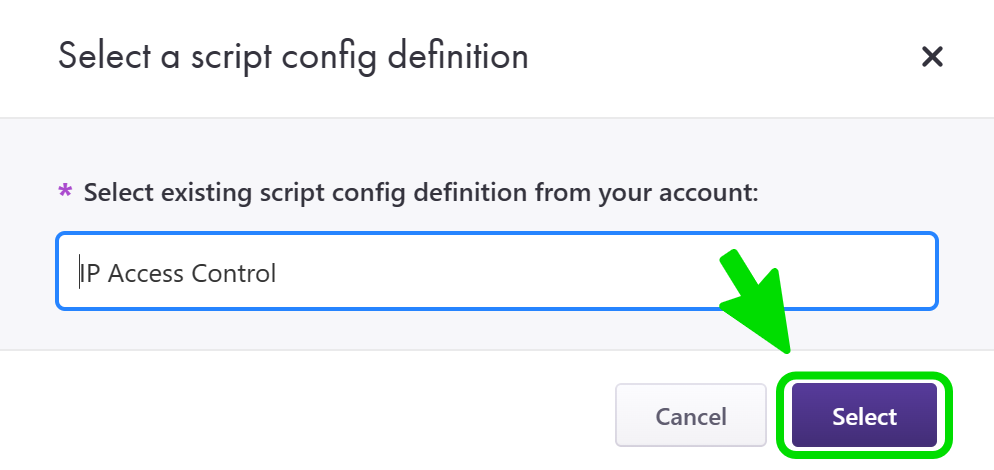
Click in the field labeled Script Config Definition to see a drop-down menu with a list of available script configs. Click on the name of the script config that you want. Then click the blue Select button. The script config that you just added will now appear at the end of the list of your current script configs.
Scroll the graphics in this step horizontally to see all the screens.

Where to Add a Script Config (Specific)
You can add a script config directly for a specific service:
Log in to the CacheFly portal
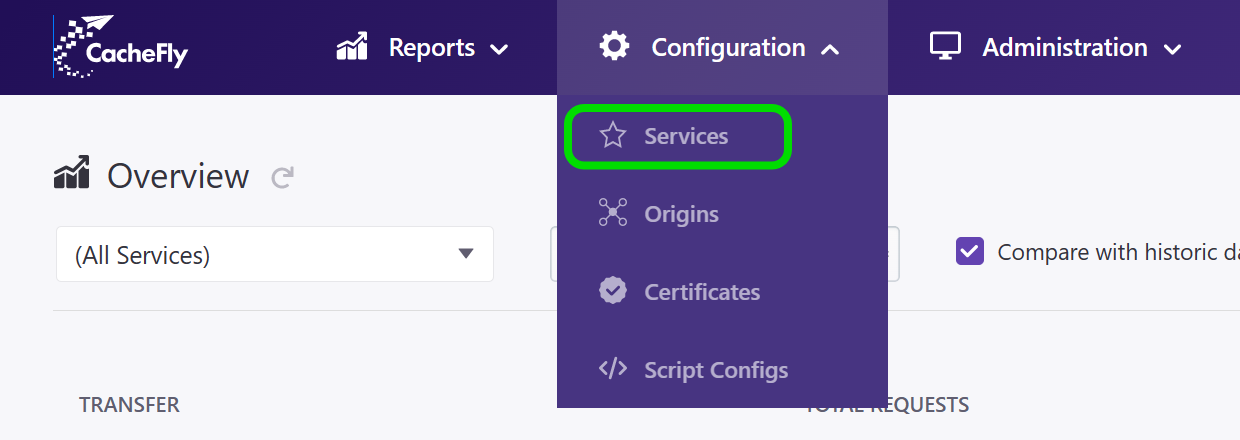
Navigate to the Configuration top-level menu
Click on the Services menu item.
A list of your currently defined services appears.
Click on the name of the service that you want.
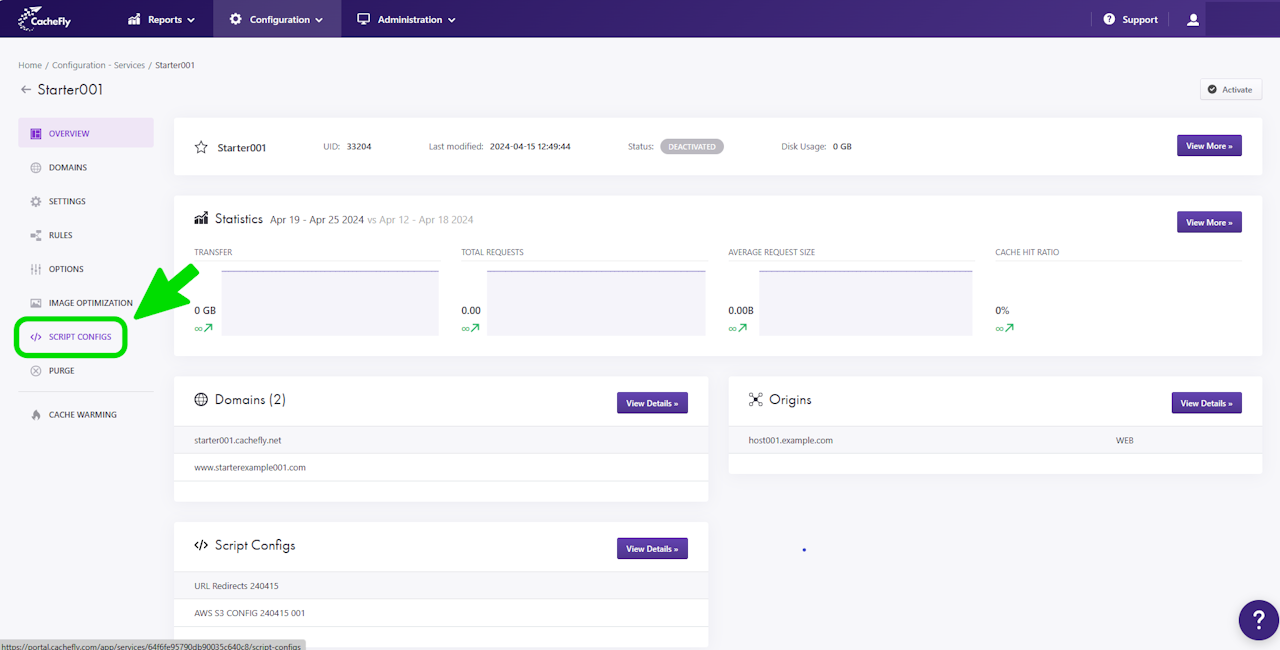
The OVERVIEW of the service is displayed.
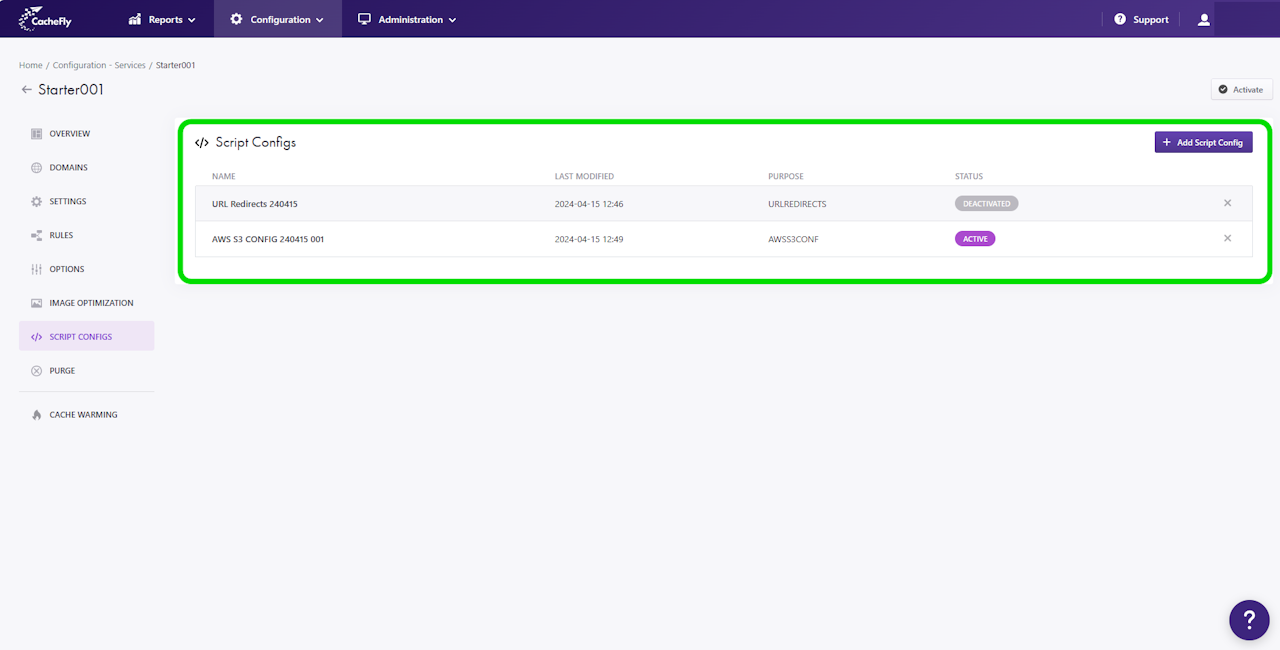
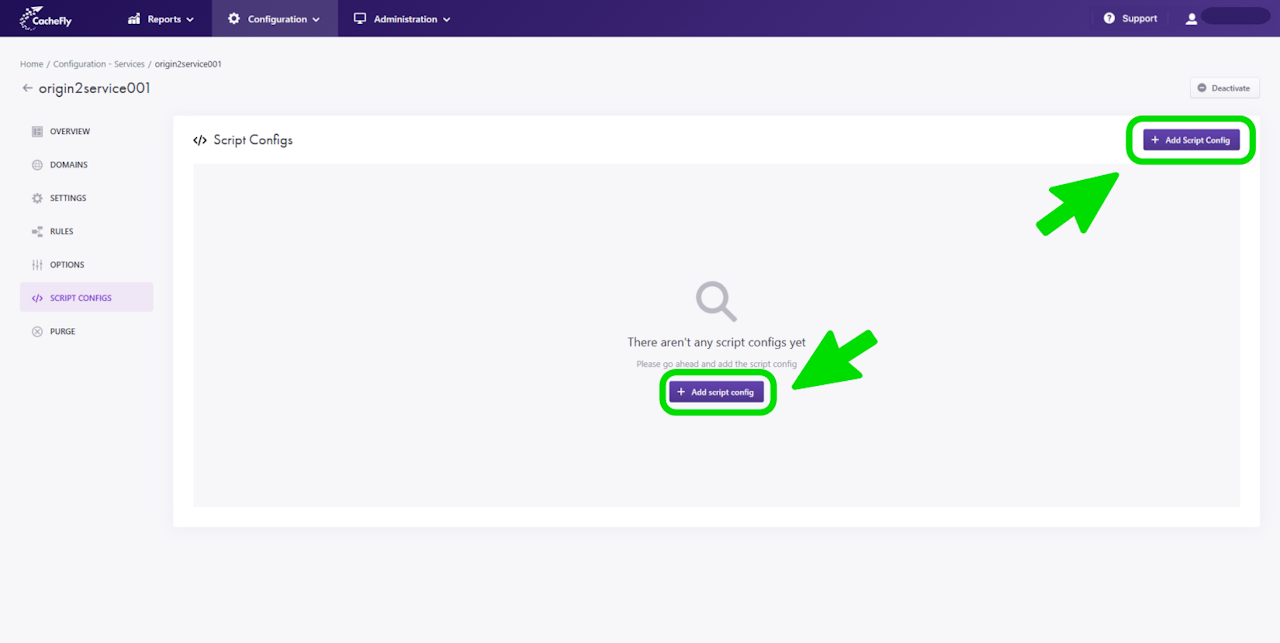
In the menu at the left of the OVERVIEW, click on SCRIPT CONFIGS.
The script config screen for the service appears.
Scroll the graphics in this step horizontally to see all the screens.

How to Add a Script Config (Specific)
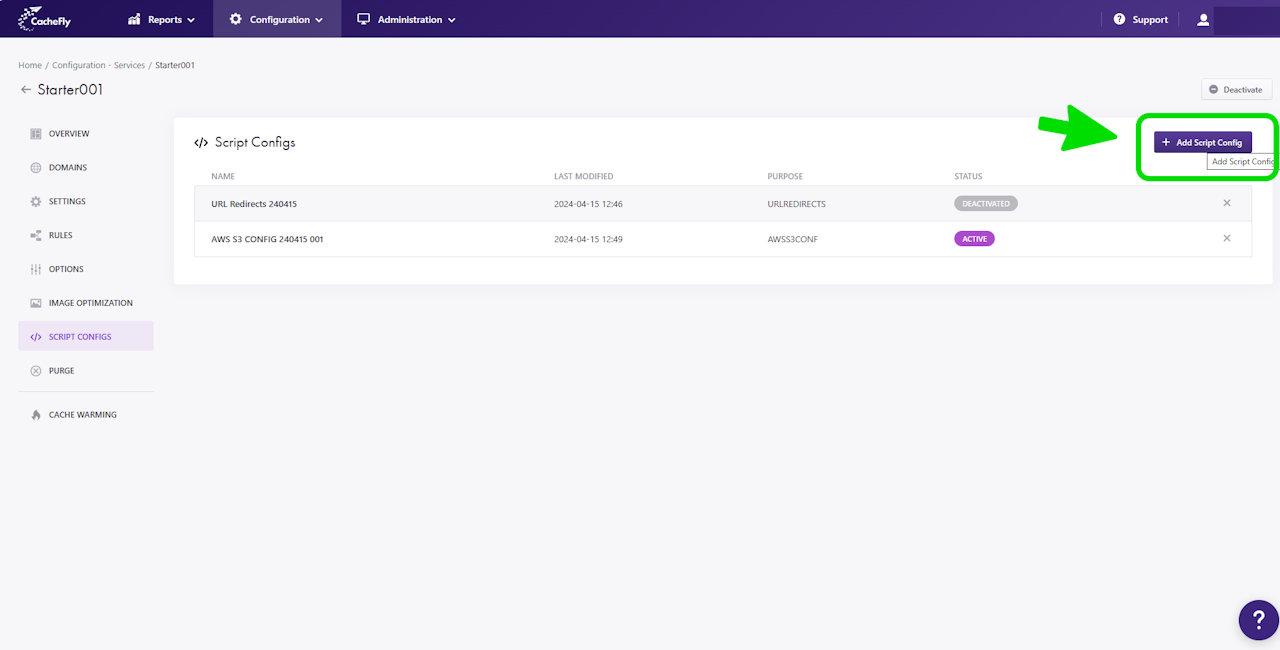
In the script configs screen for a specific service (Configuration > Services > Specific Service > SCRIPT CONFIGS), click the blue + Add Script Config button at the top right to add a script config.
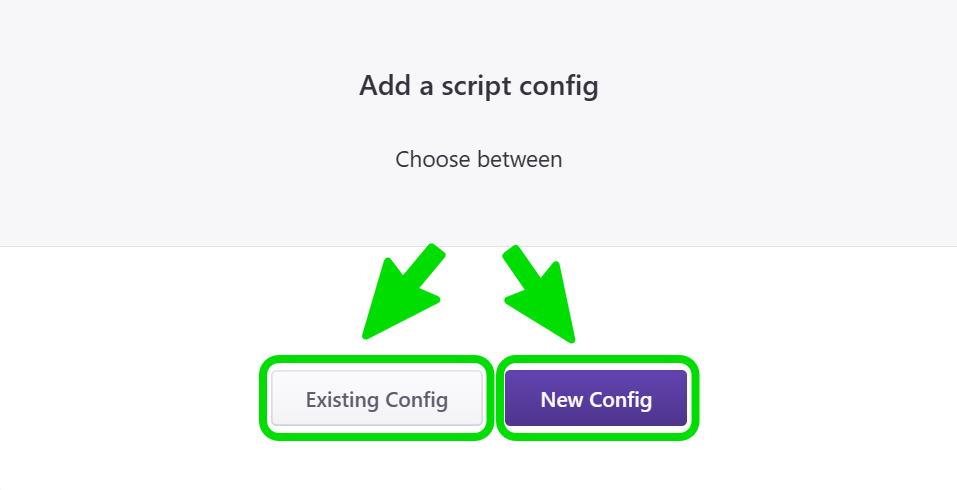
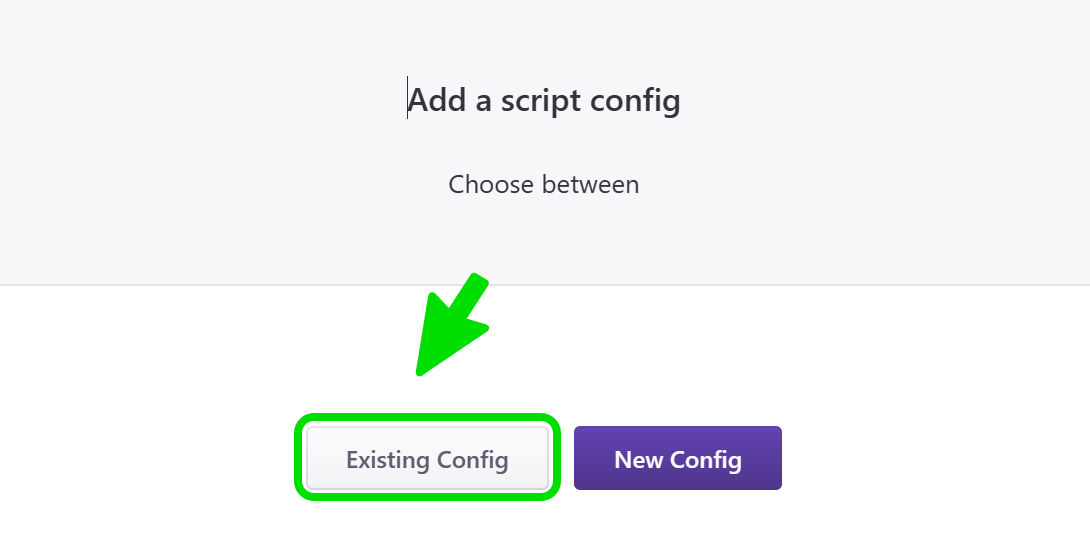
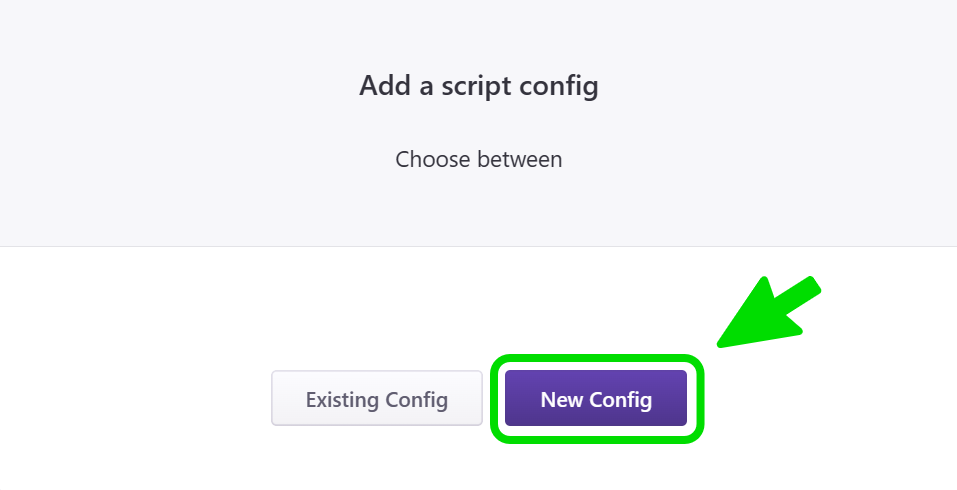
After clicking on the + Add Script Config button for a specific service (Configuration > Services > Specific Service > SCRIPT CONFIGS), a popup window will ask you to choose between:
An Existing Config
A New Config.

Adding Existing Script Configs (Specific)
For an Existing Config:
Click the Existing Config button.
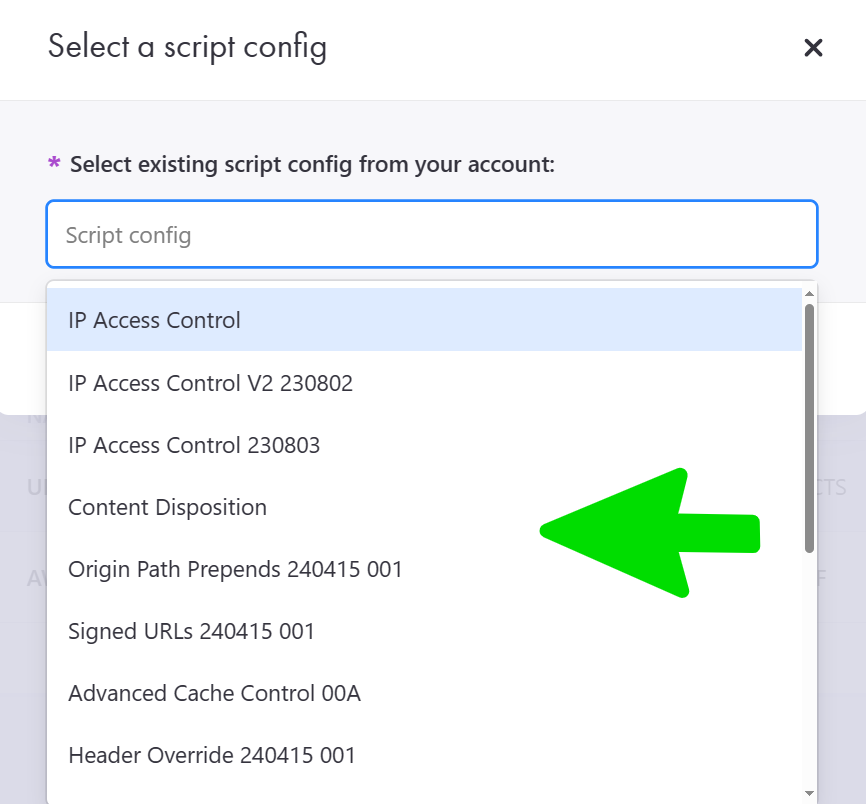
Click in the field labeled Script Config Definition to see a drop-down menu with a list of available existing script configs.
Click on the name of the existing script config that you want.
Click the blue Select button.
The existing script config that you have now added will appear at the end of the list of your current script configs for this specific service.
Note: an existing script config may already be associated with another CacheFly service. Modifying the script config can therefore have an impact on both this specific service and the other CacheFly service.

Adding New Script Configs (Specific)
For a New Config:
Click the blue New Config button.
Click in the field labeled Script Config Definition to see a drop-down menu with a list of available new script configs.
Click on the name of the new script config that you want.
Click the blue Select button.
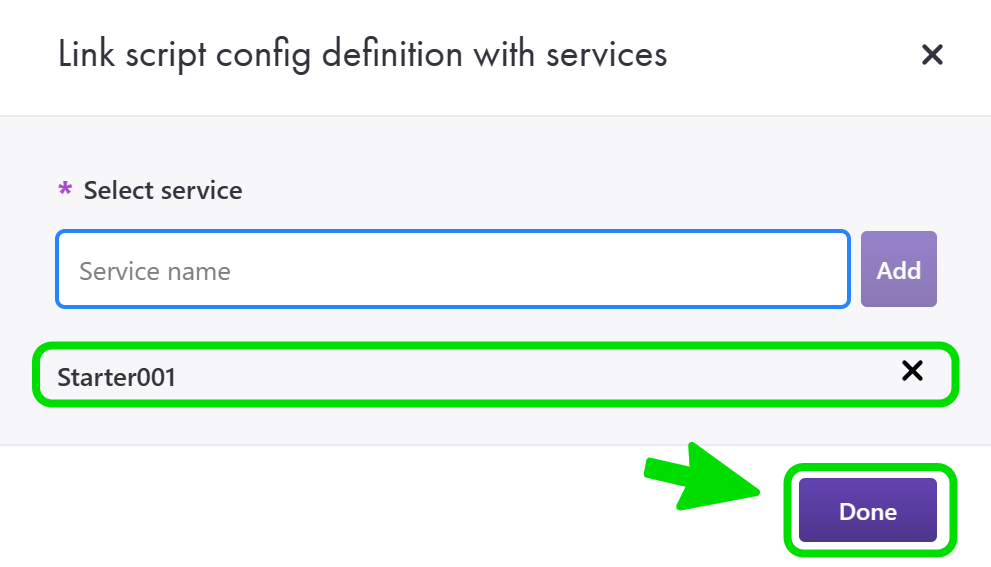
A new popup window appears for you to select the name of the service with which the new script config is to be associated. The name of the current service is already configured. Either add a further service (or remove a service from the list by clicking on the “X” to the right of the service name) or click the blue Done button.
A further popup window appears for you to assign a unique name to the new script config.
Click the blue Create button to create the new script config.
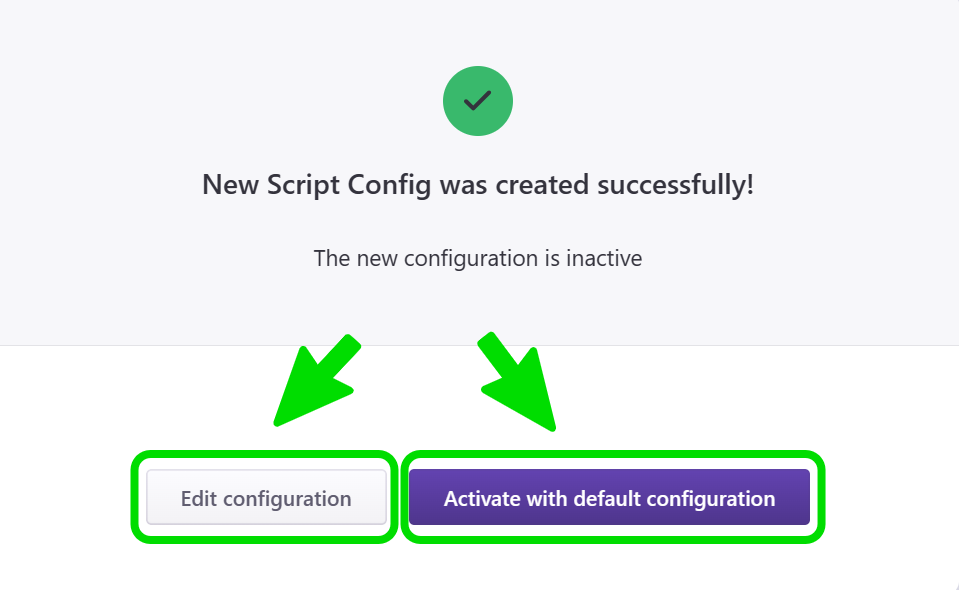
A final popup window prompts you to choose between editing the script config and activating the script config with its default configuration. In both cases, you will be directed to a screen specific to the script config, either in edit or non-edit mode accordingly.
The new script config will appear at the end of the list of script configs for your service, and at the end of the list of all current script configs in the general script config section.

Managing Script Configs
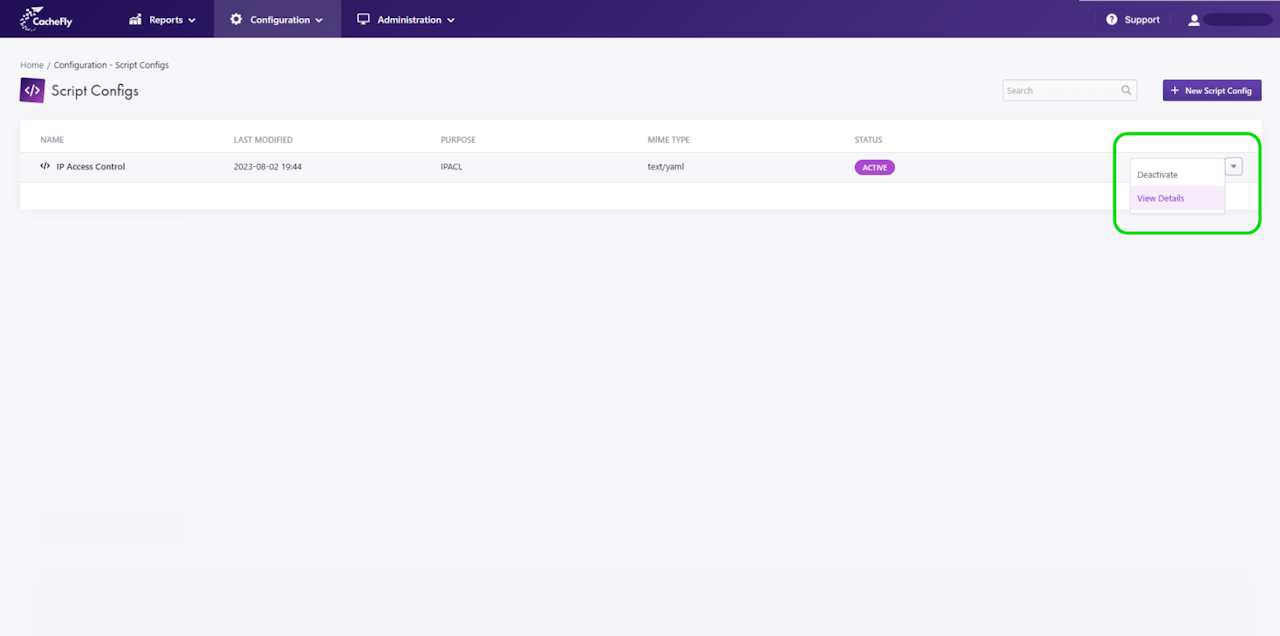
New and existing custom script config files appear in the list that is displayed when you navigate to the Configuration top-level menu and click on the Script Configs menu item.
Each script config in the NAME column is displayed with its name, purpose, MIME type, and status.
For a script config that is already a resource for you in your CacheFly account, click on the down arrow at the end of line for that script config, to access options to:
Activate/deactivate the script config
See details of the script config
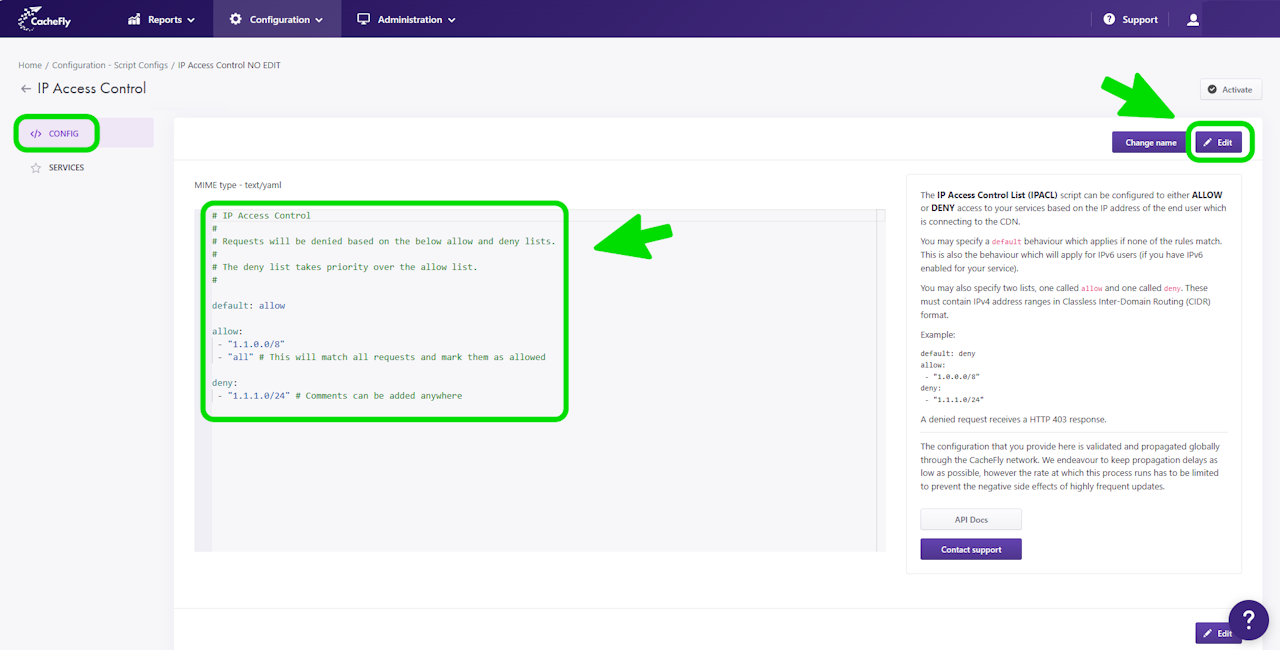
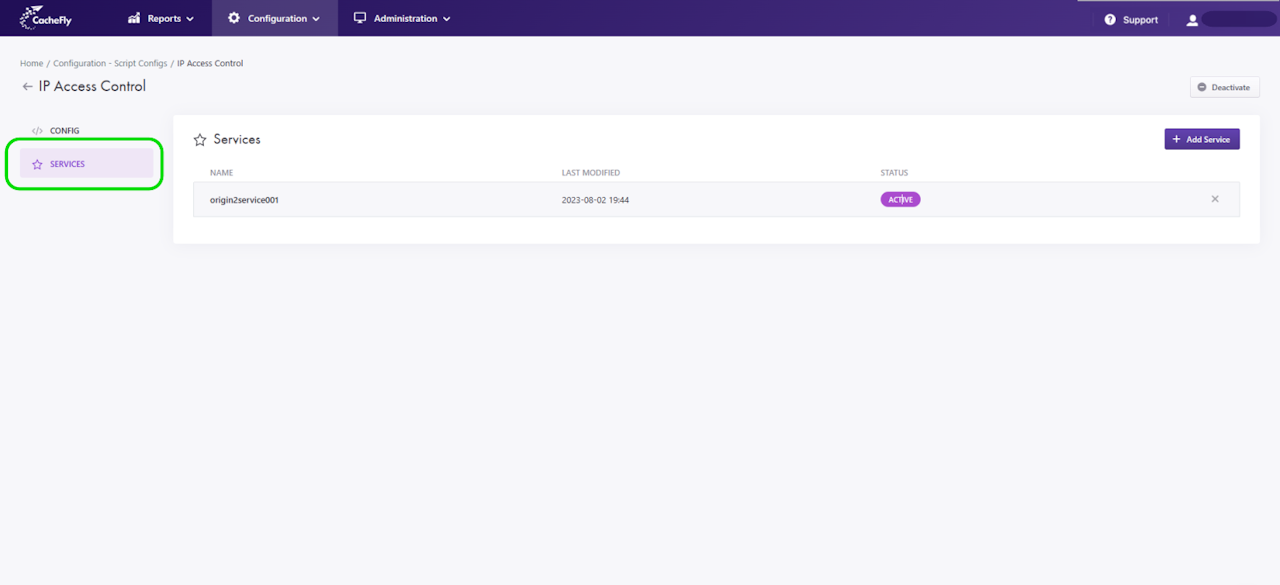
When you choose to see the details, a screen will display information and more options for the script config:
CONFIG with an edit mode to modify the script, for example, to change the values of the parameters after you have made a new version of the script
SERVICES to display the names of the services currently using the script config, as well as the status (ACTIVE or DEACTIVATED) of the script config. You can also add the script config to a new service from this screen.
Scroll the graphics in this step horizontally to see all the screens.

