Security Assertion Markup Language (SAML) and Single Sign-On (SSO)
Security Assertion Markup Language, or SAML, is a standardized way to tell external applications and services that a user is who they say they are (user authentication). SAML authentication adds an additional layer of security to your CacheFly account by requiring more than just a password to log in.
SAML also makes single sign-on (SSO) technology possible by providing a way to authenticate a user once and then communicate that authentication to multiple services, including the CacheFly portal.
The authentication of a user is provided by a SAML SSO Provider (SAML Identity Provider - SAML IdP), which is an application that you provide. The authentication is then used by a SAML Service Provider (SAML SP) like the CacheFly portal to grant access to a service for the user.
The most current version of SAML is SAML 2.0.

Where to Configure and Enable SAML SSO
To configure and enable/require SAML SSO for your CacheFly account, using the CacheFly portal as a SAML Service Provider, first:
Log in to the CacheFly Portal
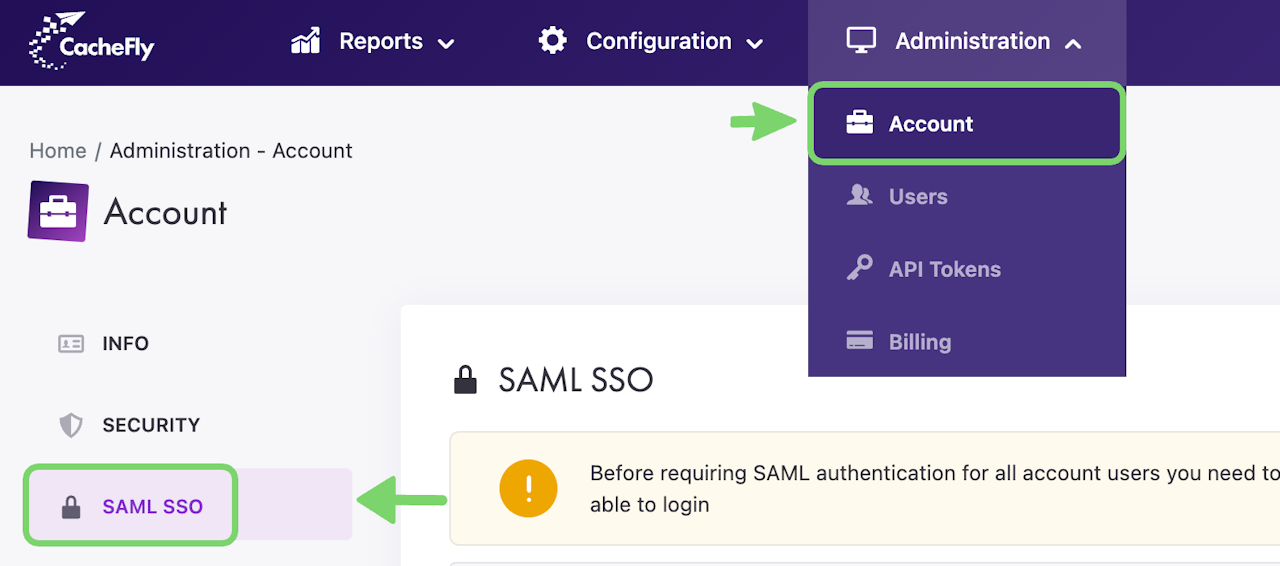
Navigate to the Administration top-level menu
Click on the Account menu item
In the top left of the screen that appears, click on SAML SSO.
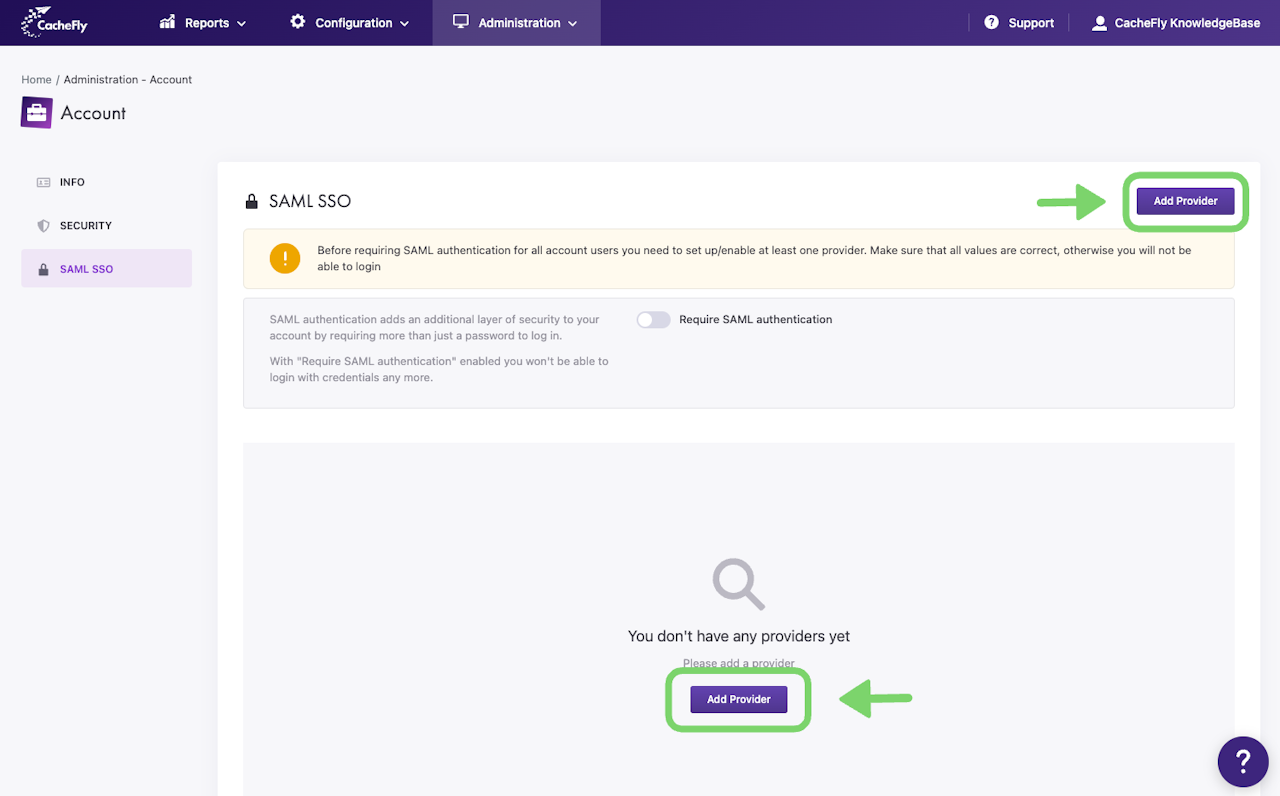
To start the process of adding information on a SAML SSO Provider (SAML IdP), click the blue Add Provider button.
Scroll the graphics in this step horizontally to see all the screens.

How to Configure SAML SSO
To use SAML authentication for CacheFly account users, you must set up and activate at least one SAML Identity Provider (SAML IdP). This IdP is an application that you provide and that you must make known to CacheFly (the SAML Service Provider in this case), for SAML authentication to be possible.
To make a new SAML Identity Provider known to CacheFly, click the blue Add Provider button in the SAML SSO main screen.
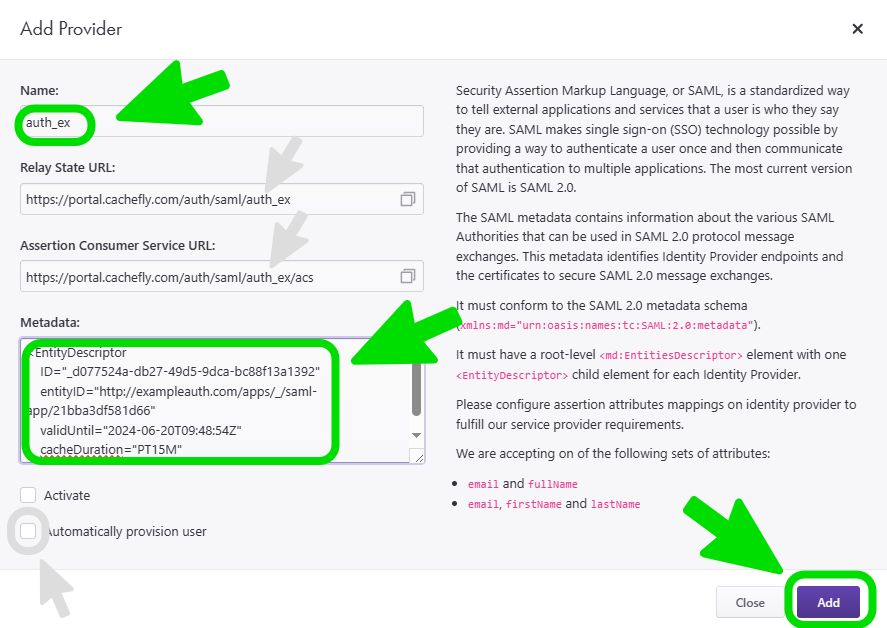
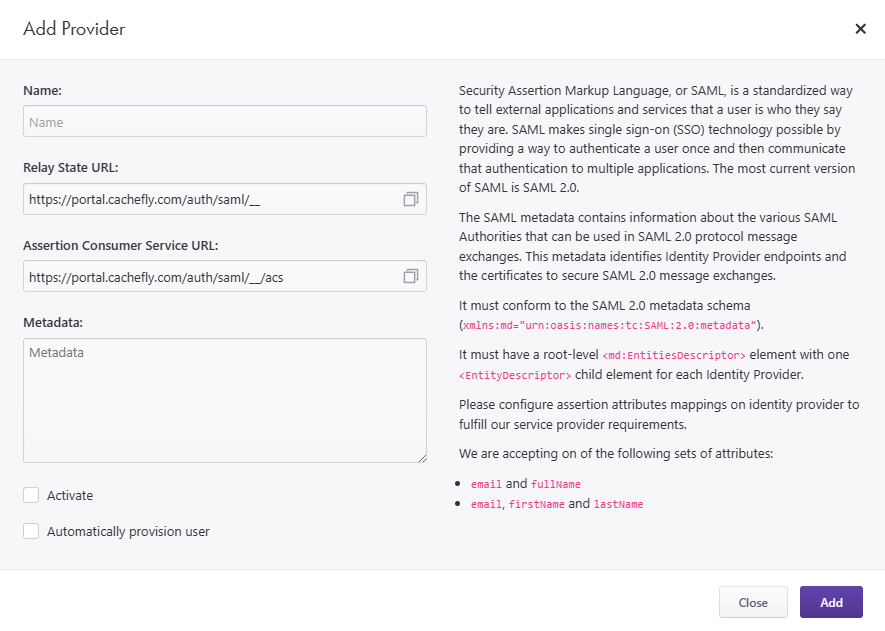
An Add Provider popup window appears. Fill in the information in the following fields:
Name: This is the name you wish to give this provider. If the CacheFly portal alerts you that this name has already been used and is therefore unavailable, choose a different name.
The two following fields for Relay State URL and Assertion Consumer Service URL will then be automatically updated with the name that you have given the provider. Click the Copy to clipboard icon (the two overlapping squares) in these two fields to copy the updated entries to inform your IdP about how to communicate with the CacheFly portal.Metadata: This is SAML IdP metadata from each SAML authority (IdP) that you want to make available for SAML 2.0 protocol message exchanges. This metadata identifies Identity Provider endpoints and the certificates to secure SAML 2.0 message exchanges. It must conform to the SAML 2.0 metadata schema (
xmlns:md="urn:oasis:names:tc:SAML:2.0:metadata") and must have a root-level<md:EntitiesDescriptor>element with one<EntityDescriptor>child element for each Identity Provider.
In addition, configure the required assertion attributes mappings (emailandfullName, ORemail,firstNameandlastName) on your Identity Provider(s) to meet the CacheFly Service Provider requirements.
You can also select the following options if you wish:
Activate: Check this option to automatically activate the IdP for your CacheFly account at the end of this configuration. You can also activate or deactivate an IdP at any time after it has been configured and added.
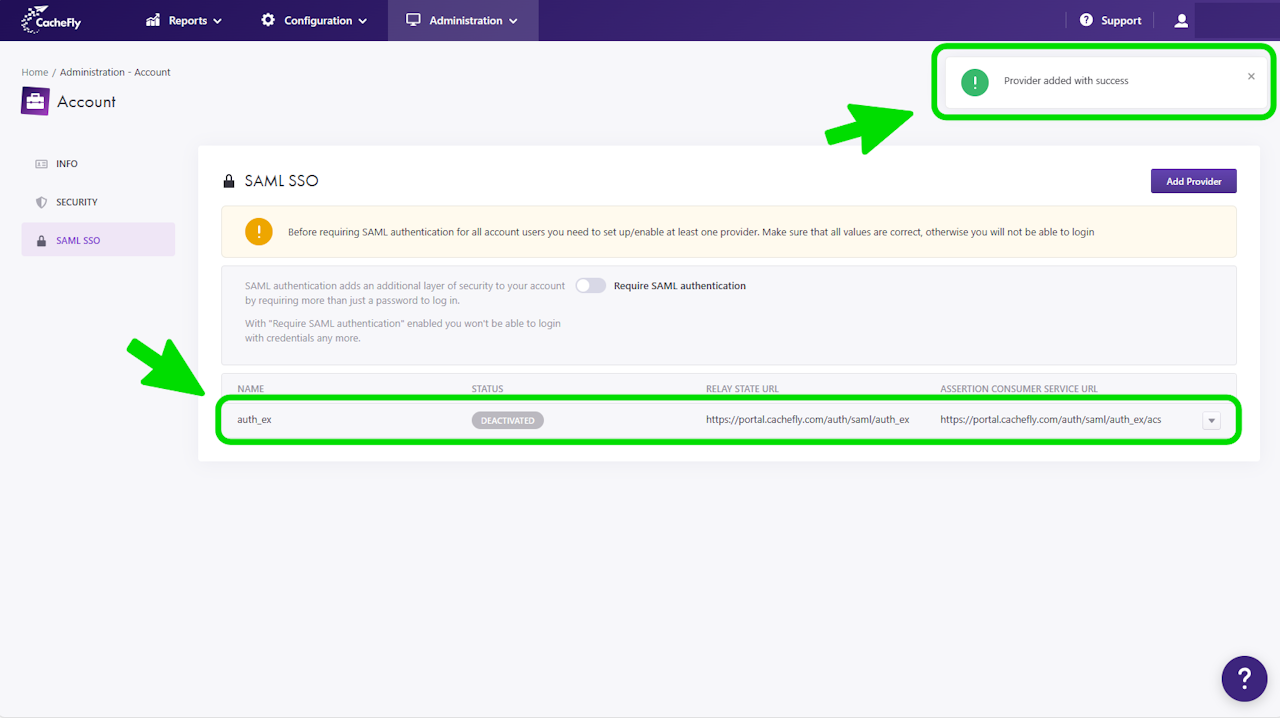
Automatically provision user: Check this option to manage users in CacheFly that have been created with your SAML Identity Provider. Checking this option will take you to a second configuration screen (see the following Automatically Provision User option step) before adding the provider. Leaving this option unchecked will let you add or update the provider immediately after by clicking the blue Add button.
Scroll the graphics in this step horizontally to see all the screens.

