

Purge Mode
You can use different ways to purge the content served by a given CacheFly service, thus leading to a refresh by CacheFly of the content from your origin.
Use Purge Mode to adjust the behavior of the purge system for the service, by choosing one of the following:
No purge (purge is disabled)
Exact purging only (a purge of a specific object)
Full directory purge (a recursive purge on everything in a specified directory.)
You can change Purge Mode for individual CacheFly services. See more on creating and managing a service.
To specify the paths to specific objects and to directories for purging, see also the section Purging Objects.
Scroll the graphics in this step horizontally to see all the screens, and where to find this function for a given CacheFly service.

Setting Purge Mode
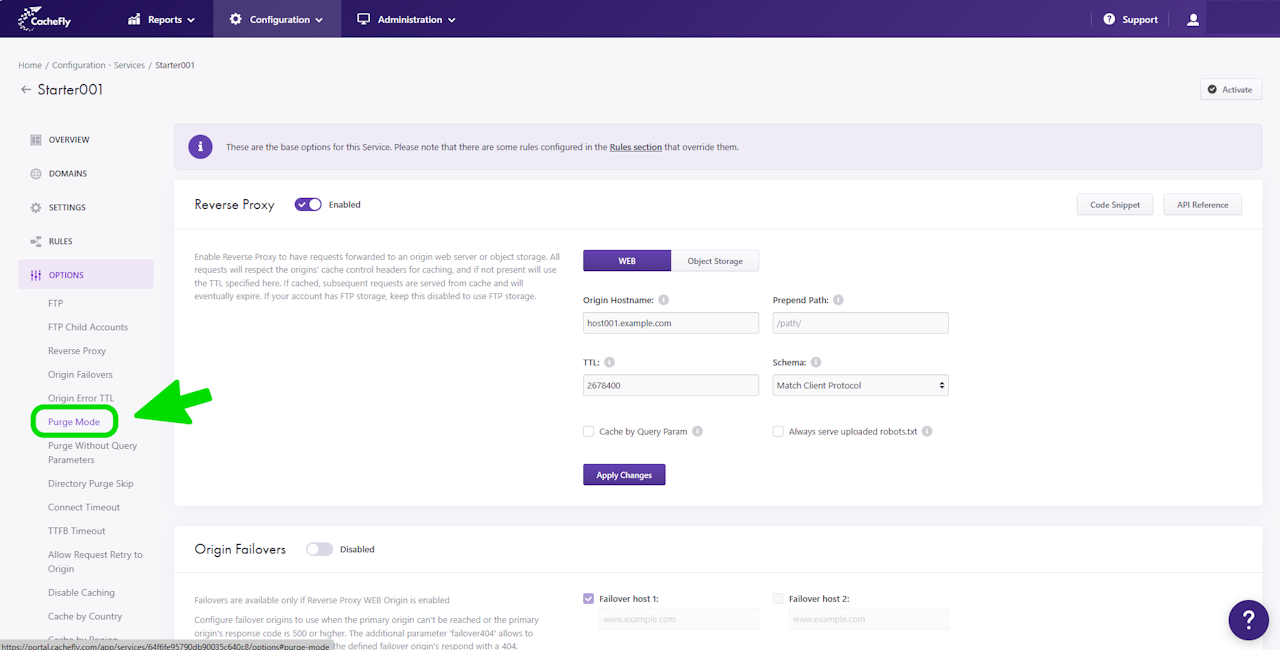
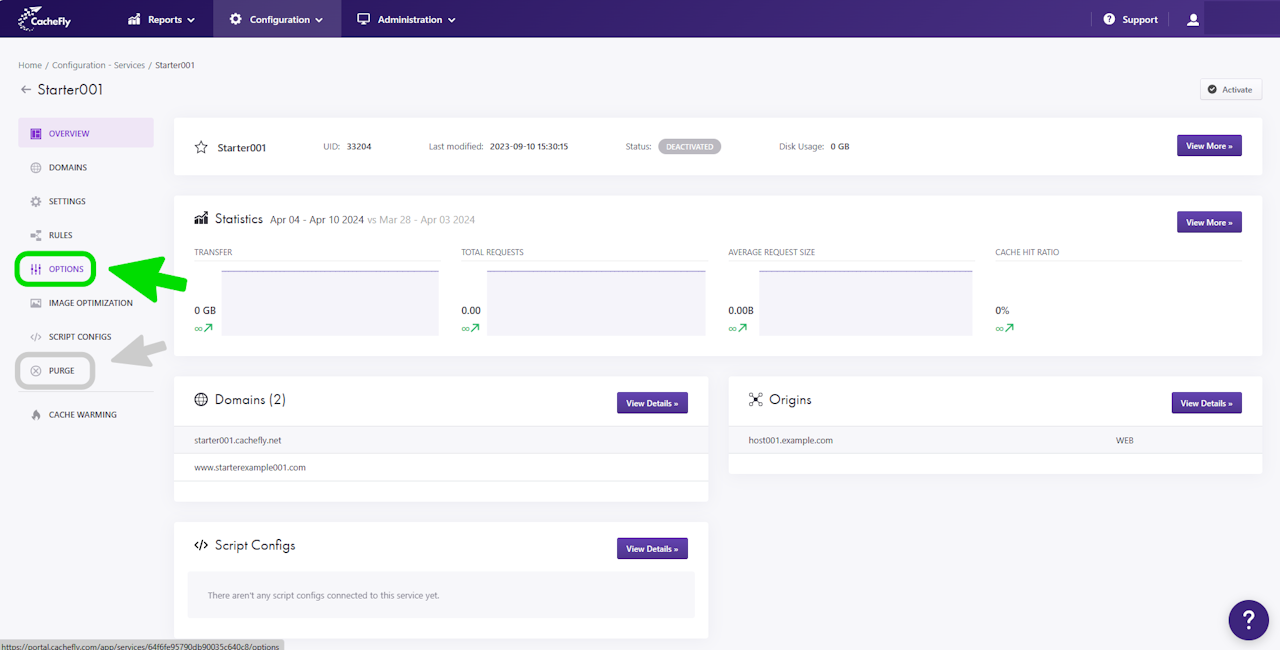
To set Purge Mode for a specific service, first navigate to the OPTIONS for that service (Configuration > Services > [SERVICE NAME] > OPTIONS in the left-hand menu).
Click on OPTIONS to expand the menu, then click on Purge Mode, or scroll down until you reach the Purge Mode section.
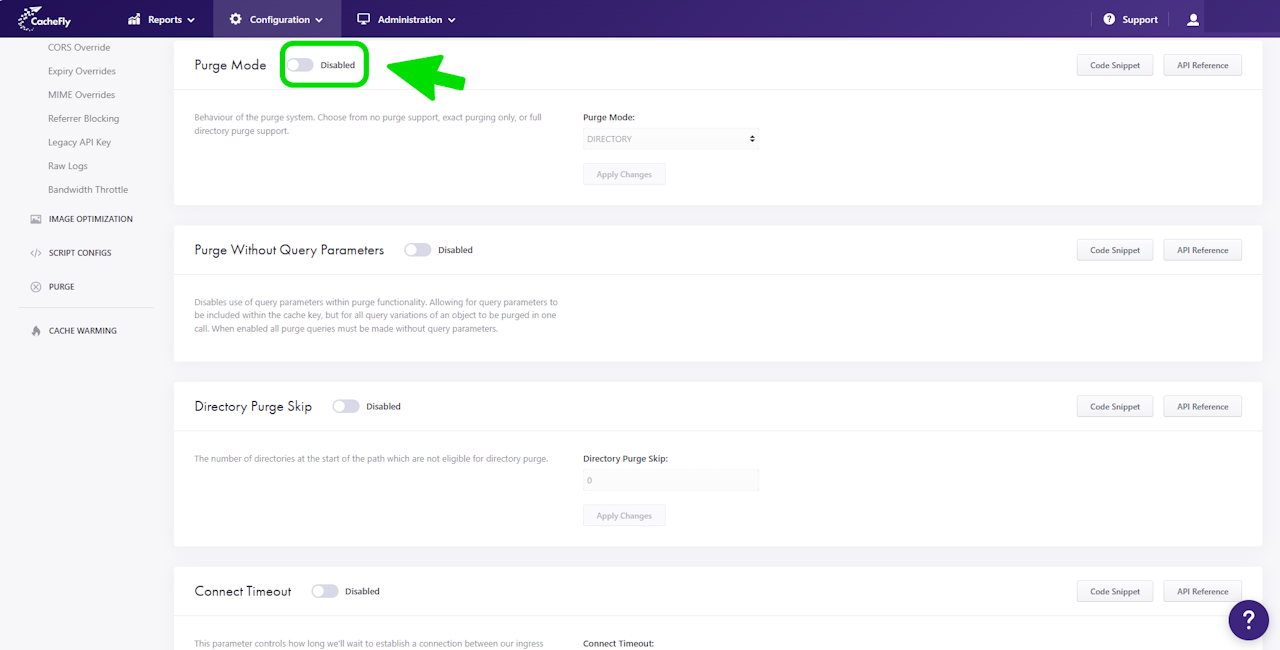
If the button/toggle to the right of the mention Purge Mode displays Disabled, then you can enable it as follows:
Click on the button/toggle labeled Disabled
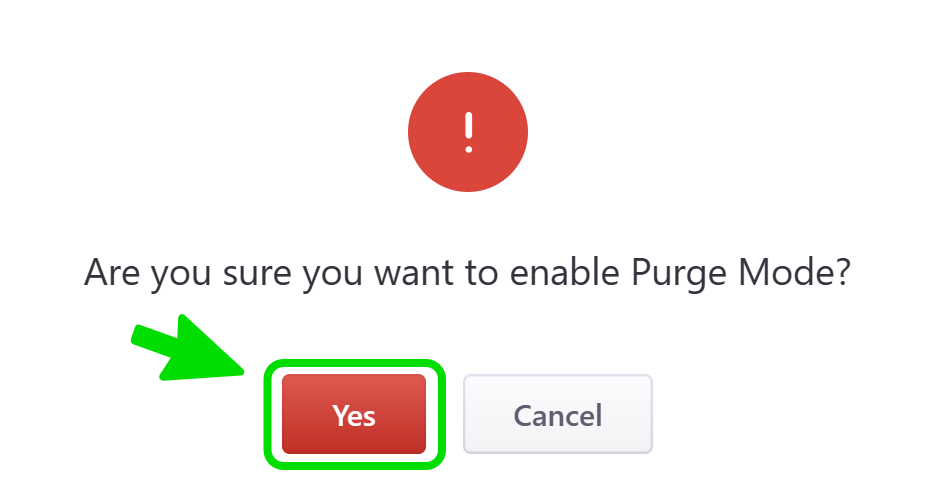
A popup window is displayed asking you to confirm your choice
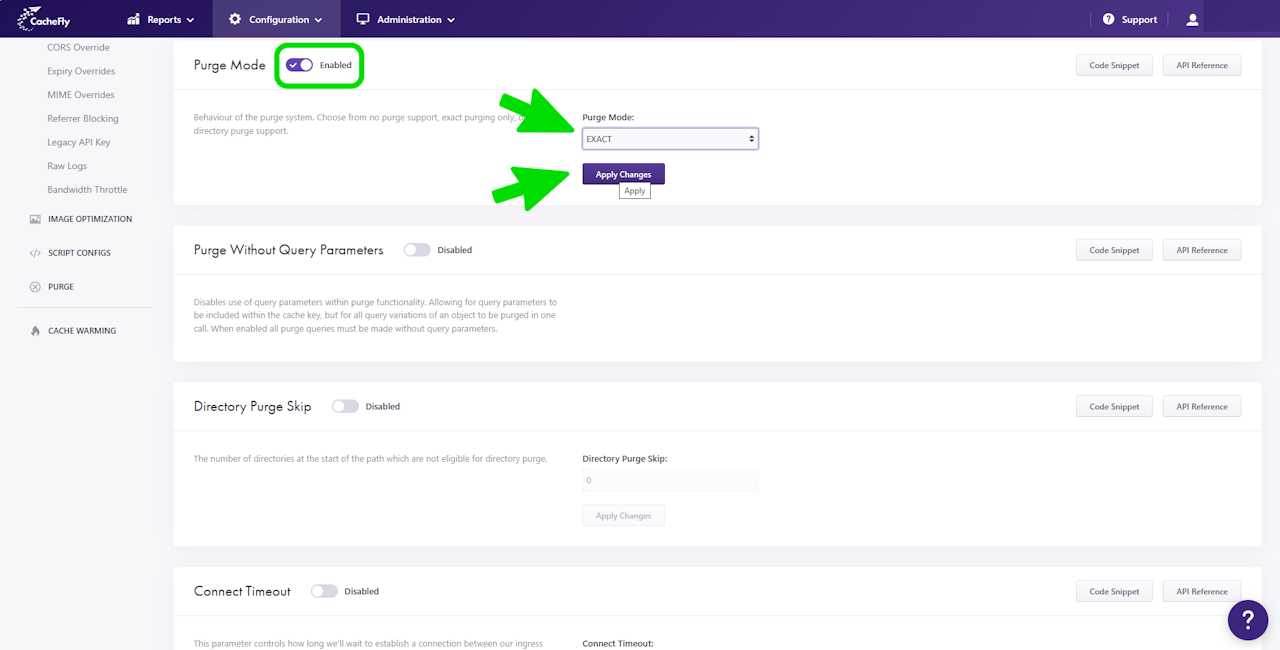
When you click on the red button Yes, the button/toggle will display Enabled and will also turn from gray to blue.
To change the behavior of the purge system:
Click on the field below the mention Purge Mode:
A dropdown menu appears with the following choices:
DISABLED (no purge)
EXACT (purge specific objects)
DIRECTORY (recursively purge everything in a specified directory)
Click on your choice in the menu.
Click on the blue button Apply Changes.
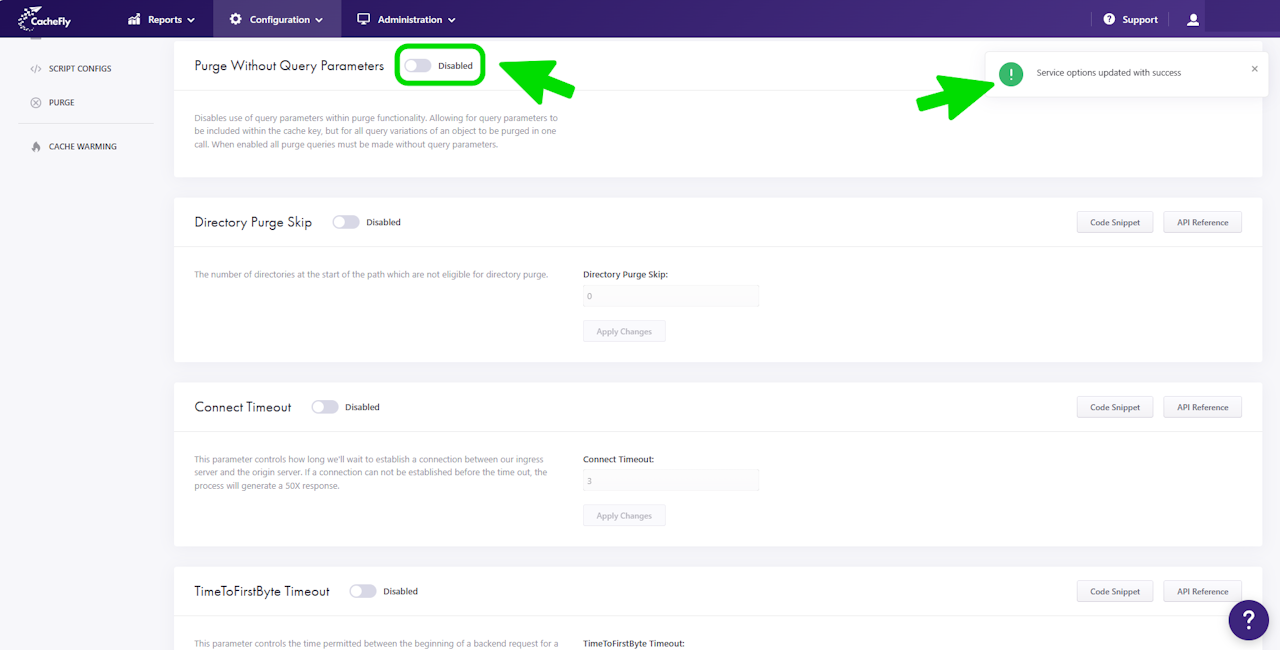
A message is displayed briefly at the top right of the screen to confirm Service options updated with success.
Scroll the graphics in this step horizontally to see all the screens.

Disabling or Resetting Purge Mode to its Initial Behavior
To reset the Purge Mode to its initial behavior of DIRECTORY, you can:
EITHER
A. Click on the button/toggle displayed as Enabled, then click on the red button Yes in the popup window that asks you to confirm your choice. The button/toggle then turns from blue to gray and shows Disabled.
A confirmatory message is displayed briefly, and the behavior (now grayed out) is displayed as DIRECTORY.
The possibility of other choices for the purge behavior is now disabled.
OR
B. Change the behavior in the field as in the preceding step, by clicking on DIRECTORY and clicking on the blue button Apply Changes.
The possibility of other choices for the purge behavior remains enabled.
Scroll the graphics in this step horizontally to see all the screens.

