

Introduction
A content distribution network (CDN) like CacheFly can improve how you serve your web content to your visitors. CacheFly offers excellence in performance, security, security, and more, to help you enhance the overall visitor experience.
Your visitors can benefit from a globally distributed service, consuming your content from the CacheFly CDN node that is closest to them, instead of requiring them to connect to a server in distant location.
This starter guide will show you the basic steps to using CacheFly for a website that we will call www.myexample.com .
Here is an overview of the steps:
Log in to your CacheFly account
Set up the CacheFly service
Enable Reverse Proxy for CacheFly to copy your content to the CacheFly CDN
Point your origin to CacheFly, so that your visitors are automatically served your content via the CacheFly CDN
Rewrite your URLs in your website pages with the address for your CacheFly service.
Each step is presented in more detail in the next steps of this guide.
Prerequisites
Before continuing with this guide, make sure that you have:
The login credentials (username and password) for your CacheFly user account, with the permissions needed for the steps listed above.
The domain name or the hostname of the existing server hosting your website. For example, if your website is located at www.myexample.com, your domain name is myexample.com, while your hostname could look like myhost.myexample.com.)
Access to edit the Domain Name Server (DNS) records for your server.
Access to edit the URLs in your website HTML code to use the CacheFly CDN versions of these URLs.
See more information on domain names and hostnames in a separate guide on adding a domain to a CacheFly service
You can also see further information in a separate guide about how to contact CacheFly Support.

Log in to Your CacheFly Account
To set up a CacheFly service for a website such as www.myexample.com :
Navigate to the CacheFly portal
In the dialog box that appears, enter your username and password, and click the Log in button.
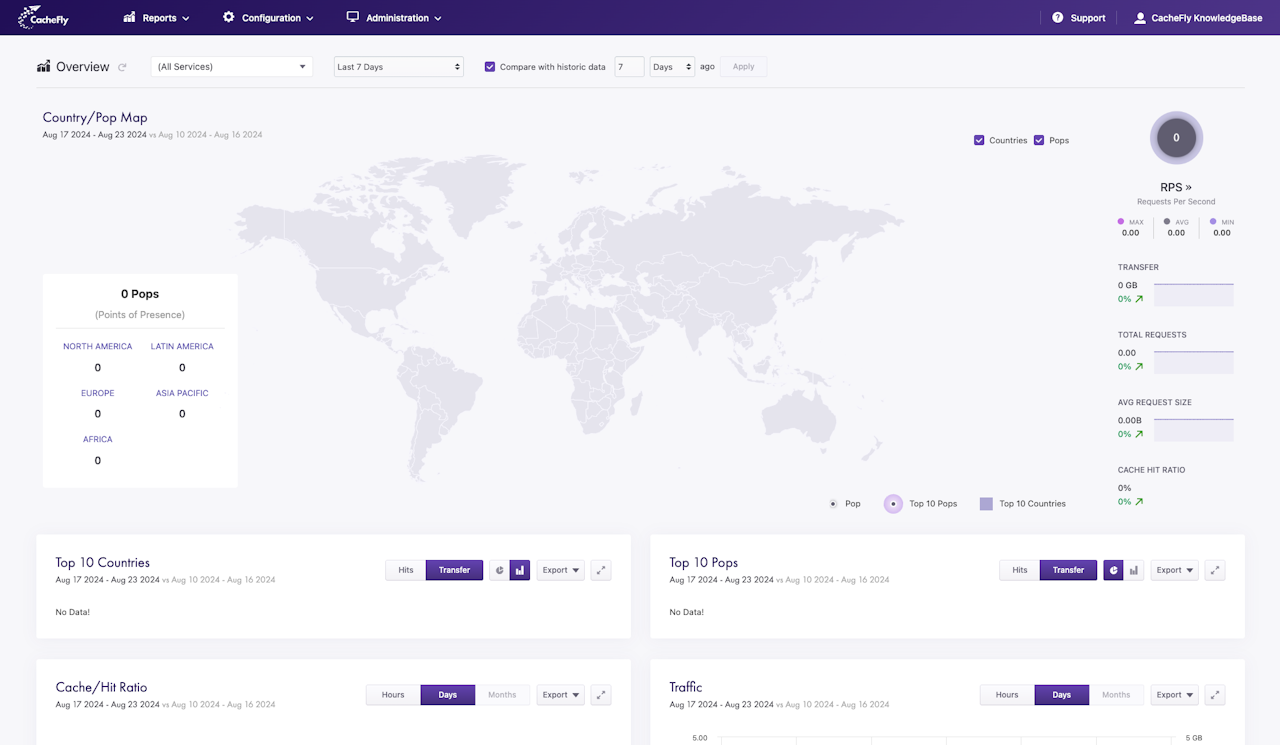
The first screen that you will see is the Reports Overview screen, showing a map of the world and your current CacheFly statistics.
Scroll the graphics in this step horizontally to see all the screens.

Set up the CacheFly Service
CacheFly provides an online configuration wizard to guide you through the setup of a service, based on the origin that you already defined.
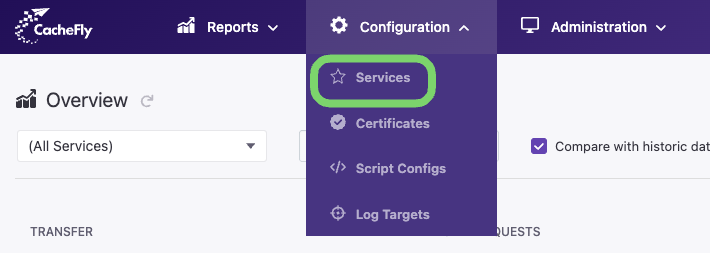
Navigate to the Configuration top-level menu
Click on the Services menu item
Click on the + New Service button (this starts the configuration wizard)
In the Create New Service popup window that appears, choose a name for the service (for instance, myexample) and click on the Create button
In the Add Reverse Proxy popup window that follows, select the WEB tab for a web based origin or Object Storage tab for an object storage based origin, such as a S3 bucket. Fill out the fields and click the Add button
A popup window now asks you Would you like to add domains to your service? but click on the Skip button* at this time
Your service has been set up successfully! The hostname assigned by CacheFly will be
{ServiceName}.cachefly.net, which in this case will be myexample.cachefly.net.**
You can also see further information in a separate guide about how to add a new service.

Enable Reverse Proxy
If a request for your content cannot be fulfilled directly by the CacheFly content distribution network (CDN), CacheFly can forward the request to your origin, if you enable Reverse Proxy for your service. All requests served by Reverse Proxy in this way will have their results cached, so that subsequent requests are served from cache storage in the CacheFly network. Objects (page text, images, and so on) cached like this will eventually again expire and be automatically refreshed.
Navigate to the Configuration top-level menu
Click on the Services menu item
Click on the name of the service (in this example, myexample) for which you want to enable Reverse Proxy
In the screen that appears, click on OPTIONS in the menu on the left hand side
The list of service option sections will appear with Reverse Proxy at the top (otherwise, scroll up or down to find this section)
Click on the button labeled Disabled to toggle it to Enabled (confirm your choice in the popup window that appears), and enter the Origin Hostname (in this example, myhost.myexample.com)
Update the values in the remaining fields or leave the default values, and click on the Apply Changes button.
You can also see further information in a separate guide about using Reverse Proxy.
Point Your Origin to CacheFly
If your origin continues to accept visitors and serve them content directly, your visitors will not experience the advantage of the CacheFly content distribution network (CDN).
To ensure that visitors access your content via CacheFly, change the Domain Name Server (DNS) record (also known as the DNS Zone File) for your origin, to point it to the address of your CacheFly service. Visitor requests arriving for your origin will then be automatically transferred to your CacheFly service.
For this, create a CNAME record for your origin (e.g., www.example.com), using the CacheFly service URL (for instance, myexample.cachefly.net) as the destination. A system administrator or hosting service provider may also be able to help or create this CNAME record for you.
Using the examples above, here is a sample CNAME record:
www.myexample.com IN 26400 CNAME myexample.cachefly.net
When this record is created, requests for pages based on www.myexample.com will automatically be converted to the corresponding request for the CacheFly service at myexample.cachefly.net.
For example, a request for a webpage at www.myexample.com/index.html will be converted to a request for myexample.cachefly.net/index.html .
See also more information in a separate guide on how to set CNAME DNS records.
Rewrite Your Origin Content URLs
In this Starter Guide, where we have started by defining just one origin and creating one CacheFly service, rewriting the origin content URLs means that visitors will receive objects on webpages directly from CacheFly, instead of from the origin.
As a simple example, a page hosted on the origin (www.myexample.com in this guide) might contain the following html code:
<html> <body> <img src="http://www.myexample.com/picture.png" /> </body></html>
By changing the content URL to align with your CacheFly service (at myexample.cachefly.net in this example), the html code becomes:
<html> <body> <img src="http://myexample.cachefly.net/picture.png" /> </body></html>
See also more information on rewriting URLs in a separate guide.
Next Steps
After following this Starter Guide to create your first CacheFly service to distribute the content from your origin to visitors, you can also use additional CacheFly features and functionality, like:

